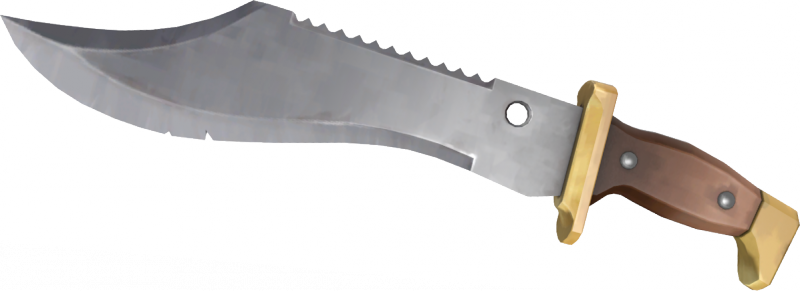
First thing I did was load up the model in SDK in order to view it from all angles and get some screenshots. Then I put it into Inkscape (the poor man's Illustrator!) in order to trace it to get a reference to print out.
I figured out how big to make the knife by seeing how big it was compared to Sniper's model- which is fucking HUGE. I actually scaled it down a bit for me but it's still much bigger than any normal bowie knife. TF2 weapons tend to be exaggerated because the character's hands are so big, so you will probably end up making them smaller in real life!
For this I used poplar, planed down to about a half inch in thickness.
I taped down my reference and cut it out on a band saw. The part sticking out at the bottom is called the tang, and for this knife I decided to do a hidden tang.
I did the same thing for the hilt. I decided to make the pommel part of the same piece so I wouldn't have to worry about attaching it. I cut two identical pieces by sandwiching two pieces of wood together with double-sided tape.
Here are all the pieces on the band saw.
I cut out the notches using a scroll saw and dremel. The beveled edge was done using a belt sander and lots of patience. My dad helped me a little with that part, it's very tricky getting it even.
I drilled out the hole in the blade with a drill press.
To get that edge I used a tiny 1/2 inch round router bit. Routers are so dang useful!
Starting to prime and sand. So much sanding! The hilt isn't primed because I planned on staining the wood.
Not shown is where I used an angled router bit to do the edges of the hilt. I messed up and angled the bottom edge of the pommel though, which isn't right. Shame on me for not double checking the references :T The little groove between the parts was done using a dremel. I also made the mistake of adding sanding sealer before staining... yeah, don't do that. I had to correct it by using brown acrylic paint to imitate the wood color, which worked out pretty well in the end.
Once I sanded everything as smooth as I could stand, I started painting. First I tried using silver rub n' buff, but the finish was streaky and awful. I read about a method using silver spray paint over black, so I tried that.
First, a few coats of gloss black. Then, Krylon 'chrome'.
For the guard and pommel I used Krylon gold. I sealed it with 'Future Floor Finish' as spray-on top coats dulled the metallic paint. :T Yeah that wasn't fun to fix.
Unfortunately while the finish ended up very glossy, it scratches very easily. I think I may have done my layers too thick, and/or too many layers. Oh well, I can say it's battle damaged! Haha...
Once it was all painted, I glued the blade into the hilt using wood glue, and used silver thumb tacks as 'rivets' on the sides.
And there we have it! I made a simple sheathe out of brown vinyl to keep it from getting too scratched up at the con. It's very lightweight and even with the scratching issues it worked out pretty well.


